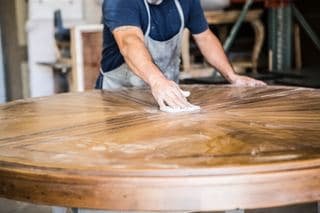
While refinishing your deck can seem like a daunting task, especially if you’ve never done it before, there are a few tricks you can follow to ensure that you ace it. By learning and putting these 5 simple steps into practice, you’ll refinish your deck quickly, easily and get excellent results. Get out a pen and paper to take notes and let’s get into it!
Table of Contents
1 – Clear and Clean
Before you start working on the wooden deck, you’ve gotta clear it and thoroughly clean it as well. This means removing anything that’s standing on it – chairs, tables and any other furniture – as well as making sure that no leaves, dirt and other debris is covering it.
After these two stages, be sure to give it a more in-depth cleaning by using a compressor if you can. With either pressurized air or water, remove any dirt and dust that’s settled into the surface – this will make the actual sanding process much easier and faster. If you use water, let the deck dry before moving on.
2 – Choose the Right Machine
One of the most important steps of all, choosing the right machine for the job can make or break the whole process. Not only does it influence how great the end results will look like but it also heavily influences how much effort and time you’ll have to pour into sanding your deck.
Although there are many types of sanders to choose from, the best ones for this type of job are random orbital, sheet and if you can afford them, floor drum sanders. If you don’t know which brand and models to get, click the following link to find out the perfect deck sander for your needs.
3 – Use the Right Sandpaper
Overlooked by many, sandpaper is a crucial part of any successful sanding. If you start too high, you’ll ruin the sandpaper, take a lot longer and fail at removing the rougher stock and if you start too low and don’t move up the ladder, you can potentially ruin your deck by sanding too deep.
For deck sanding, get yourself a set of sandpaper that ranges from 50/70 grit all the way up to 250 – that’s the general range to achieve great results from start to finish. The paper’s quality is also important so I highly recommend the Abranet sandpapers – they’re extremely well made and can endure a lot of use.
4 – Sand Slowly but Thoroughly
Now that you’re ready to begin, remember to be cautious, relaxed and take it easy. Applying too much pressure or rushing the sanding process will only deliver sub-par results and headaches so take it nice and easy.
Slowly sand every surface, corner and detailing without applying too much force. Maintain the machine straight and never sand with the edge of the pad – this will lead to marks and scratches. The machine’s speed is up to you but usually you start at slower speeds when using lower grits and then start speeding it up as you use finer and finer grits to achieve a smooth finish.
5 – Climb the Sandpaper Grit With Each Pass
The secret to the perfect finish? Climbing the grit ladder. This means giving your deck a full pass with a rougher low grit like 70 to remove all the rough stock, then switching to 120 to remove a little bit more and reveal fresh, fine wood and then giving it yet another pass with a 250 grit for example to achieve a shiny, smooth, perfect finish that’s ready to receive a stain or a new coat of paint.
As mentioned above, don’t rush this step and take your time, it’ll be worth it in the end. You can keep climbing the grit ladder into finer and finer sandpaper until you get the type of finish you want.
Bonus: Maintaining Your Newly Sanded Deck
Now that you’ve worked hard to get a beautifully fresh deck, you’ve gotta preserve it! To do this, you simply give it a coat of your favorite finish – from stains to paint and other preservatives – and in your favorite color and tone of course – from transparent to redwood, maple, white and more.
You’ll find that this type of product will have different endurance levels – some last 2 years, others 5 and others even 20. Although the ones that last longer are expensive, they’re always worth the price because they delay the next refinish you’ll have to make. After you’ve chosen your product, give your newly sanded deck a few coats of it and enjoy – you’re all done!
Conclusion
As you can see, sanding your deck doesn’t have to be such a difficult and long task, all you need to ace it is to be patient, choose the right machine and follow these steps thoroughly. Now that you’re ready, roll up your sleeves and start sanding – enjoy!


